GIMP: Create Multi Screen-shot Image
Apr 20, 2015
A software application may have a user guide and a product web site. Sometimes these require images with multiple screens combined as one image. This article shows how GIMP can be used to combine two or more images. GIMP (http://www.gimp.org/) is a free image manipulation program.
The following steps can be used to create an image of the screen shots of multiple screens. The example uses GIMP 2.8 on Windows.
Procedure Steps
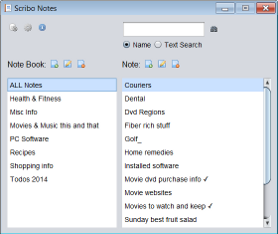
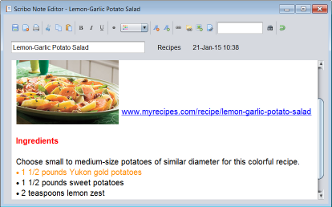
1. Capture the individual screen shots required in the target image. Use the keyboard Alt+PrtScr to copy each picture to clipboard. The following are the source images:


2. Open GIMP. Paste the picture from the clipboard as a new image using the menu: Edit > Paste As > New Image (or open the PNG image file of the source image if one exists). Repeat this for all other screen shots. Resize the images as needed using the Scale Tool.
3. Get the Canvas size (width x height) for all images: Image > Canvas Size. Arrive at a size; this should be large enough to accommodate all the source images into the target.
4. Create a new image, the target: File > New. Specify the image size from the previously arrived at value in step 3. Note this is a blank image.
About Layers
A good way to visualize a GIMP image is as a stack of transparencies; and each individual transparency is called a layer. Layers can be thought of as a stack of slides. The bottom layer is the background of the image, and the components in the foreground of the image come above it.
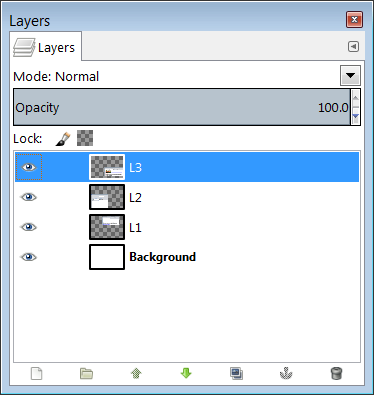
The organization of layers in an image is shown in the Layers Dialog. The Layers dialog is the interface to edit, modify and manage layers. The following is a screen shot of the Layers dialog:

The newly created target image (in step 4) is seen in the Layers dialog as a background layer. Note the Opacity is set as 100% and Mode is set as Normal. This background layer is created by default with default properties for all images. The eye symbol next to the layer thumbnail specifies the visibility; clicking it hides the Layer.
5. Select the first image to copy to the target image: Edit > Copy. Select the target image and do Edit > Paste As > New Layer. This action pastes the first source image into the target as a new layer. This can be viewed in the image canvas and also in the Layers dialog. Repeat this step for the remaining source images.
A layer has a name property and can be changed in the Layers dialog as needed. For example the layers can be named as, the background layer, layer1, layer2 etc.
6. Finish the target image:
6a. Arrange the layers on the target image canvas by moving the layer images as needed to the required position. The Move Tool is used for this.
6b. To arrange the layers up or down the stack of layers use the Layers dialog functions.
6c. To group a set or all layers use the linkage. Click between the eye icon and the layer thumbnail in the Layers dialog. This shows a chain icon, which enables to group layers for operations (like move the layer group) on multiple layers.
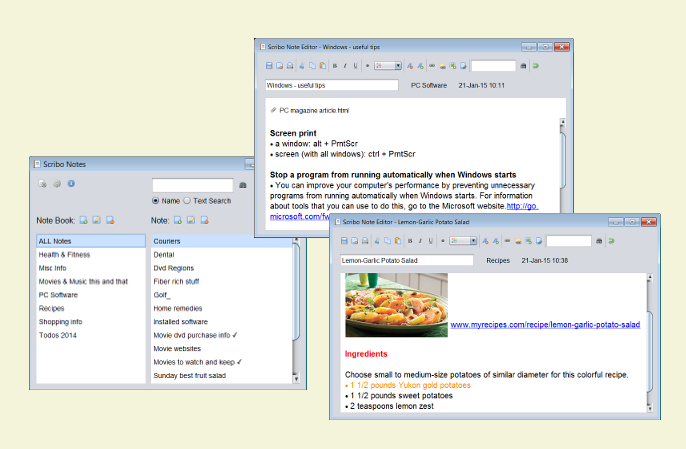
7. Save image and export it as a PNG file. Use it in the product user manual or web site. The following is the target multi screen-shot image.

GIMP Menus and Tools
From the above mentioned steps, the source images can be sized, combined as layers and arrived at the needed target image.
The primary tools used are the Move Tool and Layer Dialog. In addition the Scale Tool (for sizing) and Crop Tool (for trimming unwanted portions) can be used to get the desired result.
- The tools can be found from the menu: Tools > Transform Tools or in the Tool box.
- The Layers dialog can be viewed from any other dialog-menu: Add Tab > Layers or by doing Ctrl-L. The Layers menu can also be used.